

On the heels of our earlier step-by-step guide to creating a SolidWorks add-in, I wanted to offer a similar guide to creating SolidWorks PDM add-ins from the beginning, right up to and including deploying the add-in. Although our flagship SolidWorks drawing note add-in, Versa Note, doesn’t directly interact with PDM currently, it is possible to store your drawing note template file in your PDM vault in order to share with your full team.
Unlike SolidWorks add-ins, there is no need for a starter template (or SDK) to create a PDM add-in, so I will cover this topic by creating a project from scratch. I believe this is an important step to a deeper understanding of the process. There are, however, some great tools to expedite this process such as the PDM SDK for Visual Studio created by Blue Byte Systems. After you have followed along with this tutorial, I would encourage you to try this tool to understand the benefits it offers.
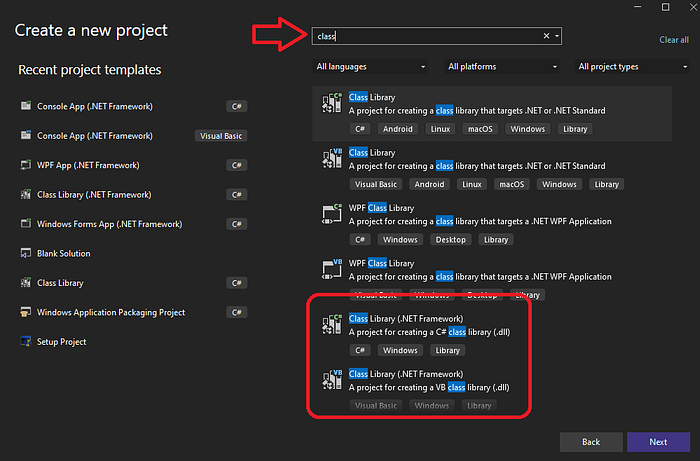
Again, we will use and Microsoft Visual Studio (reminder that although the community edition is free, it’s important to read the license terms to be sure that your usage falls within the terms of service). After opening Visual Studio, select ‘Create a new project’ when prompted:

In the search, type ‘class’ and select either the C# or VB class library (be sure to choose one of the options that include “.NET Framework”). For this guide, I will choose a C# Class Library project.
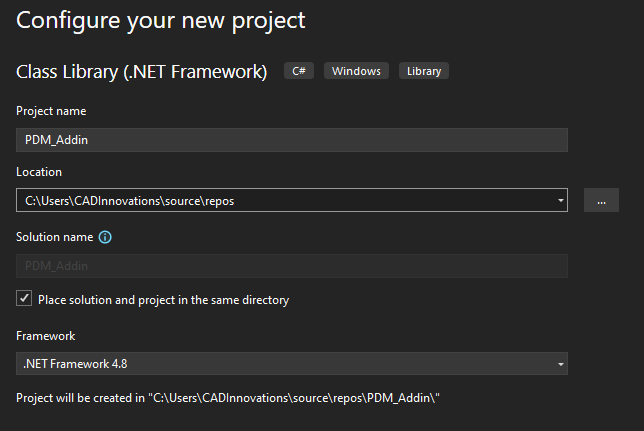
Give your project a name, verify the project save location and ensure the highest Framework is selected (i.e. .NET Framework 4.8)
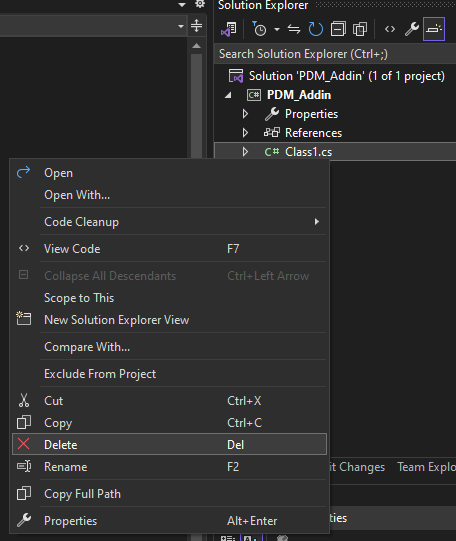
After you click ‘Create’, Visual Studio will generate a new class library project, and a class called ‘Class1’. In the Solution Explorer, you may delete this class and we will create one with an appropriate name (alternately, it is possible to rename it).
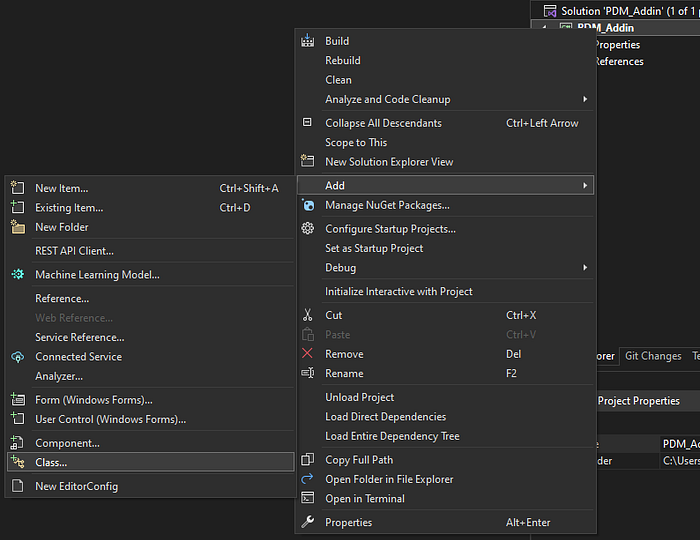
Right click on the project name at the top of the Solution Explorer and select ‘Add’ -> ‘Class…’ and call it whatever you like (I will call it PDM_Addin_Main)
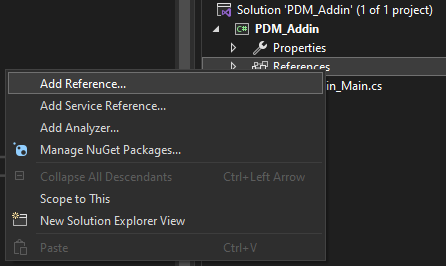
Next, we need to add a reference to the PDM library. To do this, right click on the ‘References’ node in the Solution Explorer and select ‘Add Reference…’ and browse to the file EPDM.Interop.epdm.dll in the local PDM client installation folder (likely C:\Program Files\SolidWorks\SolidWorks PDM)
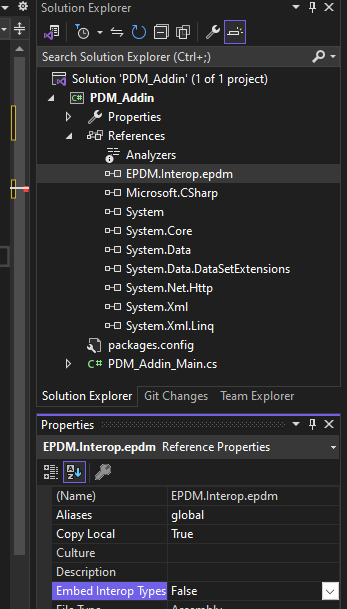
To avoid unexpected behavior, SolidWorks recommends setting the ‘Embed Interop Types’ setting to False for the EPDM.Interop.epdm dll.
At the top of the PDM_Addin_Main.ca file, you will see a number of ‘using’ statements. The default using statements can be removed and replaced by a single line:
using EPDM.Interop.epdm;Next, we need to implement the PDM addin interface. Tim Corey offers great content covering C# development, and has several great videos explaining the concept of interfaces. Assuming you don’t have time to watch them, think of an interface as a contract; and by implementing the interface, your application must fulfil the terms of the contract by including the methods and properties required by that interface.
Visual Studio makes it easy to implement an interface. After the ‘using’ statement you added above, make the following change:
using EPDM.Interop.epdm;

namespace PDM_Addin
{
    internal class PDM_Addin_Main
    {
    }
}
Becomes:using EPDM.Interop.epdm;
using EPDM.Interop.epdm;

namespace PDM_Addin
{
    [Guid(""), ComVisible(true)]
    public class PDM_Addin_Main : IEdmAddIn5
    {
    }
}
Note that we have added the GUID & ComVisible properties to the PDM_Addin_Main class, made the class public and we have implemented the interface IEdmAddIn5 using a colon after the class name.
Last, let’s generate a GUID or Globally Unique Identifier, which is a randomly generated 36 character string assigned to each windows application. It’s length and complexity ensures that no two applications are assigned the same value. To generate a GUID, press the Windows key, and type PowerShell to search for and run Windows PowerShell. In PowerShell, type the following, and press Enter:
[guid]::NewGuid()Then add the resulting GUID to your code:
using EPDM.Interop.epdm;
namespace PDM_Addin
{
[Guid("90b7faf9-5f46-4deb-bd00-9754ac5d2e9b"), ComVisible(true)]
public class PDM_Addin_Main : IEdmAddIn5
{
}
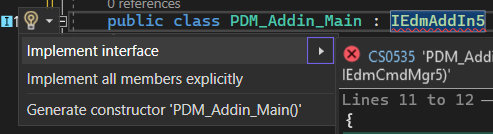
}Visual Studio will underline IEdmAddIn5 red, indicating that the ‘terms’ of the ‘contract’ have not be fulfilled. Thankfully, Visual Studio offers an easy way to add the missing methods and properties. Simply hit ‘ctrl-.’ and select the ‘Implement Interface’ option:
This will add 2 empty methods: GetAddInInfo and OnCmd. The GetAddInInfo method is used to provide information about the add-in when it is loaded by PDM, and is where we will specify the triggers that our add-in will watch for. The second method will fire when any command is executed, and will be used to execute the code we provide. In the GetAddInInfo method, we’ll remove the line
throw new NotImplementedException();and replace it with few simple lines of code, so your method looks like this:
public void GetAddInInfo(ref EdmAddInInfo poInfo, IEdmVault5 poVault, IEdmCmdMgr5 poCmdMgr)
{
  poInfo.mbsAddInName = "Awesome PDM AddIn";
  poInfo.mlRequiredVersionMajor = 21; // minimum supported version PDM 2021

  poCmdMgr.AddCmd(1, "Amazing Menu Command"); // menu command
  poCmdMgr.AddHook(EdmCmdType.EdmCmd_PreState); // state change event
}
You can find a full list of PDM hooks (events that can be used to trigger code) here.
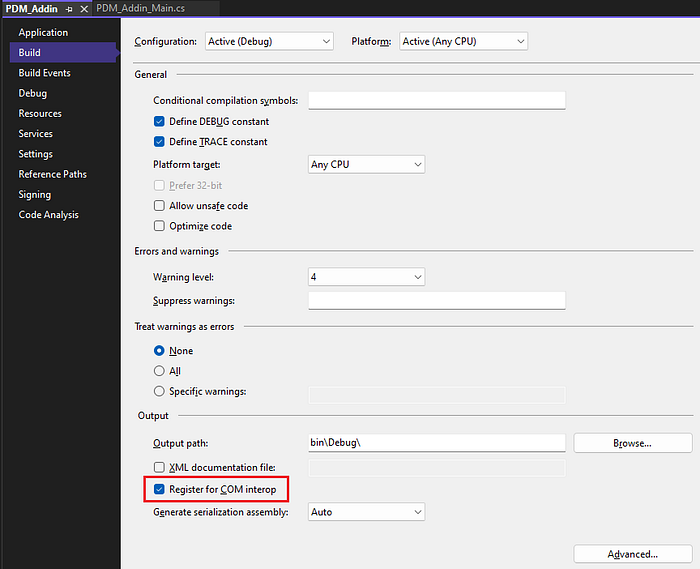
The last setup step is will allow it to load in PDM. In the Solution Explorer, double click on ‘Properties, select ‘Build’ tab, and check the option to ‘Register for COM interop’
Now we’re ready to make the add-in do something. For now, let’s keep it bare bones, and simply display a message to the user. In a future blog post, we will update the add-in to perform more useful tasks.
In the OnCmd method, we’ll add the code to handle the menu command and pre-state change hook we added:
public void OnCmd(ref EdmCmd poCmd, ref EdmCmdData[] ppoData)
{
    IEdmVault21 eVault = poCmd.mpoVault as IEdmVault21; // get the PDM vault object

    if ( poCmd.meCmdType == EdmCmdType.EdmCmd_Menu )
    {
        if ( poCmd.mlCmdID == 1 ) // menu command 1
        {
            eVault.MsgBox(0,
               "Congratulations, the menu command executed successfully!");
        }
    }
    else if ( poCmd.meCmdType == EdmCmdType.EdmCmd_PreState )
    {
        EdmMBoxResult result = eVault.MsgBox(0,
            "Congratulations, the state change method executed successfully!" +
            "\r\nPress 'Cancel' to cancel the transition", EdmMBoxType.EdmMbt_OKCancel);

        if ( result == EdmMBoxResult.EdmMbr_Cancel )
        {
            poCmd.mbCancel = Convert.ToInt16(true); // this will cancel the transition
        }
    }
}
Now we can build our add-in!

To load the add-in in PDM, open the Administration tool and expand the node for your vault, then right click on Add-ins and select “New Add-in…”. Browse to the files in the project output folder:
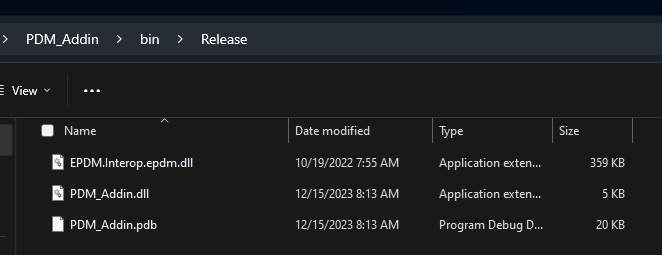
Select all of the files and add to PDM. Any time you load a PDM add-in, it is necessary to restart the Explorer process to load the new add-in. The easiest way to do this is to open the Windows Task Manager (Ctrl-Shift-Esc) then right click on Explorer and select Restart (alternatively, you can log out and back in).
Now you can browse to your vault and open the Tools menu, where you should see the menu command we added. You may also transition a file to see the state change message we added.
That’s it! In a future post, we will talk about debugging PDM add-ins and we will implement functionality to make this add-in more useful. As always, thank you for reading, say tuned for more tutorials, if you haven’t checked out our SolidWorks drawing notes add-in Versa Note, now is the time; download and start your free trial today!